From SPIP 4 onward images are added to articles in a simple and standardised way through a single model<doc>
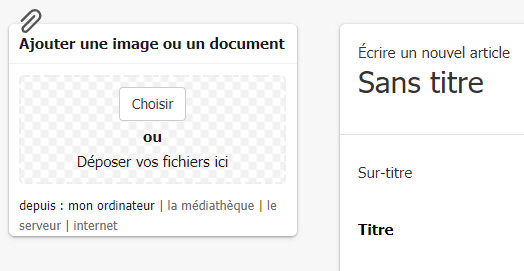
Add an image to an article
- In the private area of SPIP, go to your article.
- Add your image using the add image form

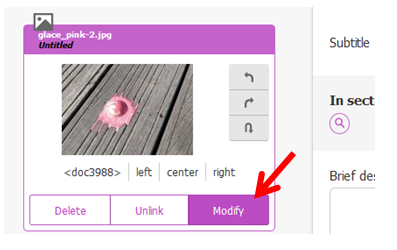
You select the image to be downloaded from your hard drive. After uploading, the image will appear next to the article with its unique number.

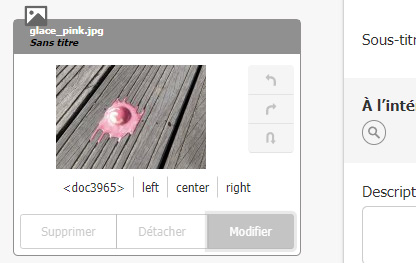
You can then perform the following actions:
| Insert image | Simply copy the code <doc3988> into the text of your article (see next paragraph) |
|---|---|
| Edit image | The arrows allow you to rotate the image if it is not properly oriented. |
| Delete Image | The image file is deleted from the site. |
| Unlink image | The image has been removed from the article but is still available in the site’s media library. It can therefore be used elsewhere. |
| Modify image | Opens a window that allows you to enter information about the image (title, description, credits) or to update the image file |
Use image code <docXX> to illustrate the article
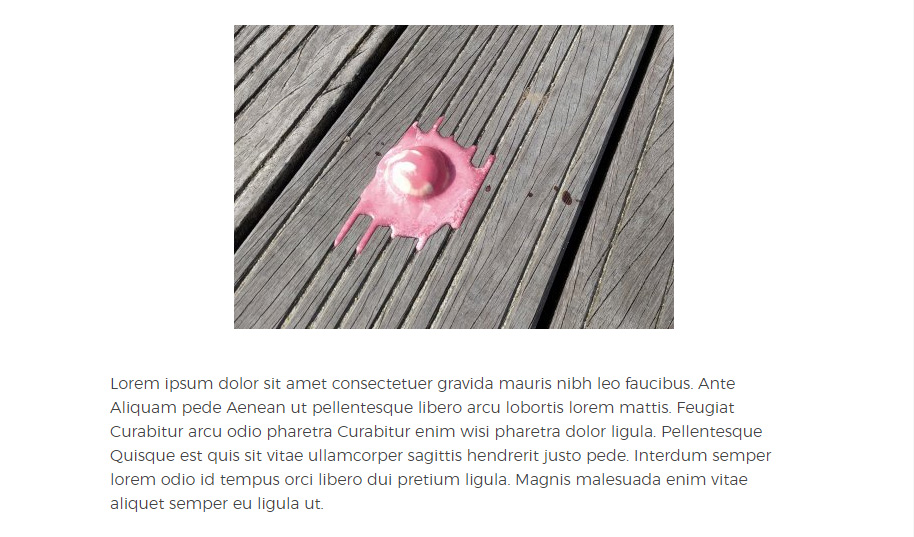
To place the image in your article simply add the resulting code <docXX> to the article text.
<doc3965>Lorem ipsum dolor sit amet consectetuer consequat et Donec lacinia id. Lorem pretium Curabitur lacus Pellentesque leo id volutpat Donec ....
This gives the following result:
To display images included in the text of an object, templates often specify a maximum display size using the |image_reduire filter. Regardless of this size, the thumbnail of images whose original dimensions are larger than the value of the constant _IMAGE_TAILLE_MINI_AUTOLIEN include a link to display them larger in the Mediabox.
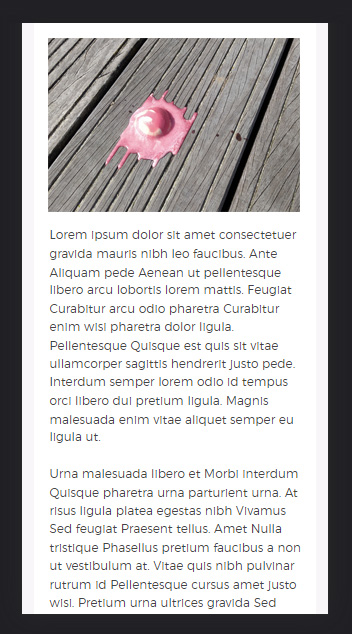
In any case, it should be kept in mind that the final display on the public site can vary enormously depending on the graphic design of the site and also on the device with which you consult the site.
| Page viewed from a smartphone | Page viewed from a desktop computer |
|---|---|
|
|
Aligning the image with codes<docXX|left>, <docXX|center> and <docXX|right>
You can also specify the alignment of the image with the following codes
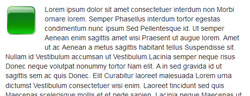
Default position <docXX>The image is placed in the thread of the text |
|
Left position <docXX|left>The image is floated to the left and the text wraps around it on the right |
|
Centred position <docXX|center>The image moves to the centre and the text moves to the line |
|
Right position <docXX|right>The image is floated to the right and the text wraps around it on the left |
|
Resize
It is possible to reduce the size of images by specifying either a width or a height.
- The code
<docXX|largeur=200>will display an image limited to 200px in width. - The code
<docXX|hauteur=150>will display an image limited to 150px in height.
Add a link
You can add a link to an image by adding:
<docXX|lien=http://www.monsite.ltd>
The image will become clickable and will redirect to the specified link.
Fill in the caption
It is possible to add a caption to the image.
To do so, click on the ‘Edit’ button.

You can then enter the title, description of the image, credits, alternative text for the image, etc.
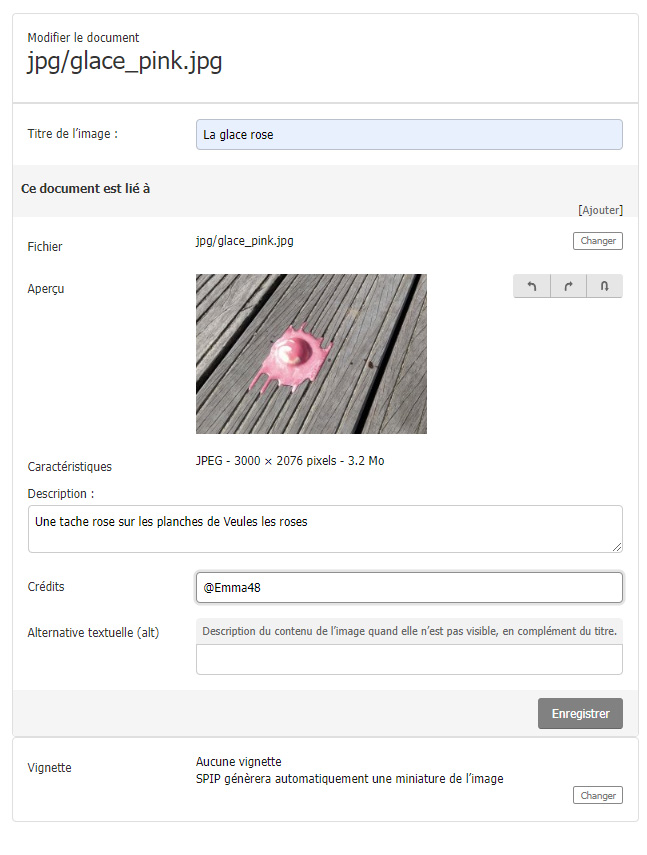
This may result in the following display:

Hide the caption or one of its elements
Starting with version 4.2.8 of SPIP, it is possible to display an image without its caption, title, description or credits. To do this, use the following codes according to your needs:
- <docXX|masquer=legende> to hide the entire caption;
- <docXX|masquer=titre> to hide only the caption title;
- <docXX|masquer=descriptif> to hide only the caption description;
- <docXX|masquer=credits> to hide only the caption credits;
It is also possible to hide several of these elements by separating them with commas:
For example, <docXX|masquer=descriptif,credits> will hide the description and credits.
The "seen" images
Images whose code has been used in the article are marked in the private area with an "eye" icon.

These are the images filtered by the criterion {vu}. These images cannot be deleted or unlinked. Therefore, the corresponding <docXX> in the text of the article will have to be deleted first.
In the default template, the remaining images are listed in a portfolio at the bottom of the article.
Organising the images of an article
In the private area, all the images in the article are listed at the bottom of the article.

The following buttons allow you to change the views (more or less compact).

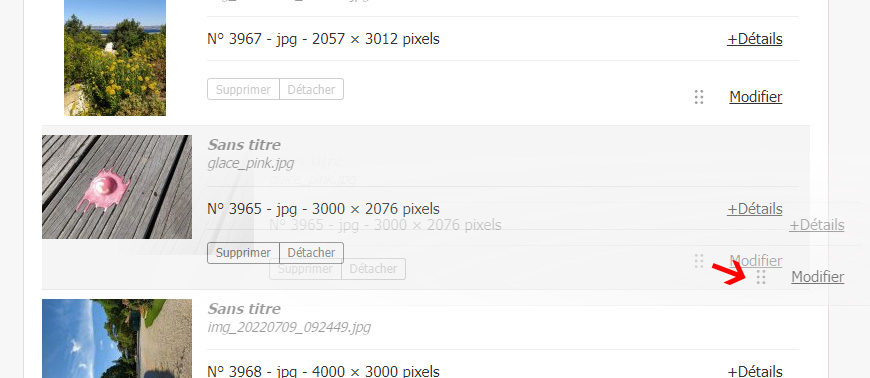
It is also possible to change the order of the images via drag and drop.
In the default template, this feature is used to arrange the images that are listed in the portfolio.
Organising images for an article
In the private section, all images in the article are listed at the bottom of the article.
The following buttons allow you to change the views (more or less compact).
It is also possible to change the order of the images via drag and drop.
In the default template, this feature allows you to organise the images listed in the portfolio.
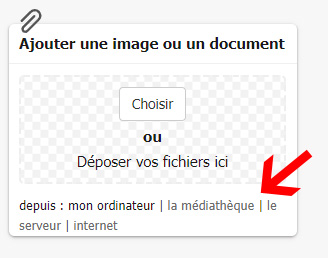
Other options in the add image form

- from my computer: allows you to upload a file stored on your hard drive.
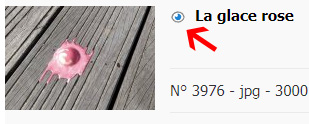
- from the media library allows you to select a document already added to the site. You select the image from the media library. This avoids having to upload images that have already been uploaded.
- from the server: allows you to upload documents that have been dropped by FTP into the
/tmp/uploaddirectory on the server. - from internet: allows you to add a remote resource, for example a photo from an image library or a document from another website.
Changes from previous versions of SPIP
The use of images has been simplified in SPIP 4.
For editors used to SPIP 3 and previous versions, the main changes are :
- No more distinction between the concepts of images and portfolio
- removal of models
<img>and<emb>(which nevertheless remain active to ensure backwards compatibility) in favour of the single model<doc>.
Detailed explanation (in French): changes in image management with SPIP4.0