General Principle
SPIP shortcuts are a handy way to display images in SPIP. Those shortcuts are translated into a HTML code (which is described and set in the templates found in the folder : /plugins-dist/medias/models/). This HTML code is further "dressed" with the CSS code stylesheets (that you can customize) in order to display the final look of those images.
Warning : The way images are displayed or look can thus change from a website to another, according to how you set your CSS stylesheets, or whether you decide to override the default templates. If the final result doesn’t suit you, please analyse first how the stylesheets are set.
In short...
For busy ones who don’t have time for long explanations...
| Shortcut | Meaning | Illustration | Portfolio |
|---|---|---|---|
<img> |
images | Image | Thumbnail + Link |
<doc> |
document | Image + Title | Thumbnail + Title + Link |
<emb> |
embed | Image + Title | Thumbnail + Title |
More detailed explanations follow...
Add images
article 5631
Add an image to an article using SPIP 3
Illustration or Portfolio?
There are two ways to display your images with SPIP :
- Illustration for an article : that helps you explain some parts of your text with an image (inside the body of your text)
- Portfolio : that is intended to display a set of images, such as in a photography portfolio, a slide show... (all together at the end of your text)

You can easily switch from one method to another by selecting the appropriate setting


Case # 1 : Image set as Illustration
The three shortcuts <img>, <emb>, and <doc> are equivalent and will lead to the same result : They will display a full size image.
Further, the two <emb> and <doc> shortcuts will display the image caption, if you have set one (which is not a default setting for the <img> shortcut).
Examples below, with the same image :
code <img94>
code <doc94>
code <emb94>
Case # 2 : Image set as Portfolio
If your image is set as "Included to the Portfolio", then using one of the three shortcuts <img>, <emb> or <doc> will make them appear in the body of your text (and thus, will take them "out of the Portfolio").
| Shortcut | Comments |
|---|---|
<img> |
will display the thumbnail with a clickable direct link to the full-size image |
<doc> |
will display the thumbnail AND its caption with a clickable direct link to the full-size image |
<emb> |
will display the full-size image and its caption, without any link (it is embedded) |
Examples below with the same image :
code <img95>
code <doc95>
code <emb95>
[1]
How to use the align parameter : left, right, or centre
The images are always displayed in the FLOW of the text according to the HTML syntax. Here is something you need to keep in mind: the link to the image must always be written at the BEGINNING of your text in order to appear as "part" of your paragraph, whether you chose to set it on the left-hand side, the right-hand side (regarding the text orientation) or the centre of the page (and this is the way the HTML works).
Let’s analyse the following examples :
| Setting | Graphic result | code | Final result |
|---|---|---|---|
| Default setting | the image is displayed following the flow of the text | <imgXX> |
|
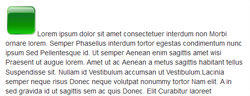
| Left | the image is displayed on the left-hand side of the text and the text wraps around it then continues below until the end of the text. | <imgXX|left> |
|
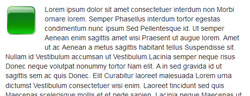
| Center | the image is displayed at the top-centre of the text and the text starts underneath, below. | <imgXX|center> |
|
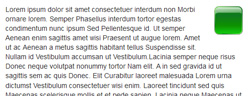
| Right | the image is displayed on the right-hand side of the text and the text wraps around it then continues below until the end of the text. | <imgXX|right> |
|
Remember to always write the image code BEFORE your text, whatever orientation you wish it to get :
the right way :
<imgXX|right>Lorem ipsum dolor sit amet consectetuer consequat et Donec lacinia id. Lorem pretium Curabitur lacus Pellentesque leo id volutpat Donec ....
and the wrong way (that will display the image underneath your text, separated from it — which is not what you want to get):
Lorem ipsum dolor sit amet consectetuer consequat et Donec lacinia id. Lorem pretium Curabitur lacus Pellentesque leo id volutpat Donec ....
<imgXX|right>
Note : You can choose to write the image code in the flow of your text (as above) or underneath, with a line-break. But please note that there should be no blank space between the line code for the image and your text, since both are considered two parts of the same paragraph in HTML code. If you skip a line, it will be interpreted as two distinct paragraphs and you won’t obtain the desired result.
To be more precise :
This works :
<imgXX|right>
Lorem ipsum dolor sit amet consectetuer consequat et Donec lacinia id. Lorem pretium Curabitur lacus Pellentesque leo id volutpat Donec ....
This doesn’t work :
<imgXX|right>

Lorem ipsum dolor sit amet consectetuer consequat et Donec lacinia id. Lorem pretium Curabitur lacus Pellentesque leo id volutpat Donec ....
And to set your images in-line (depending on their size, of course), simply set the same align parameter for all of them, for example "left" :
<img50|left><img57|left><img58|left> ...
Tips : Depending on how you have set your CSS stylesheet, you can reset the alignment of the floating elements , such as : <docXX|left>, <imgWW|right> by using the horizontal rule’s shortcut : ---- (four dashes). Otherwise you will have to set it specifically with the HTML code as follows : <div style="clear:both"></div>, eg. below:
<docXX|left><div style="clear:both"></div><imgWW|right>